A general purpose (script collection) plug-in.
The keKit Docker is designed to be as compact as possible, using tabs:

- Download zip file, from 'Releases' section -->
- Manual installation/upgrade method recommended:
- Open downloaded zip file
- In Krita, go to Settings ‣ Manage Resources ‣ Open Resource Folder.
- Put kekit.desktop and kekit folder inside the pykrita folder.
- Put kekit.action into the actions folder.
- Restart Krita.
Some scripts can be assigned to shortcuts (and some are intended to be!)
in Settings/Configure Krita/Keyboard Shortcuts/Scripts/keKit:

The scripts are also listed in Tools/Scripts in a keKit sub-menu,
as an alternative to the docker (for some scripts), or just a quick shortcut overview:

Snap/Move selected paint/vector/group layer by Layer's nearest bounds anchor point to the Document's nearest bounds anchor point
Tip: Assign to shortcut
Short YouTube Video demo:
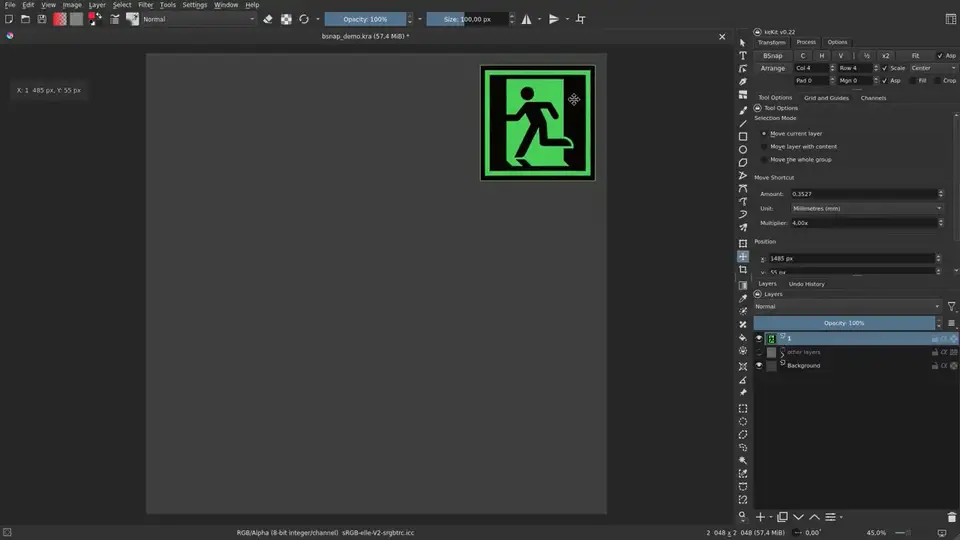
- These are the 9 (virtual) Bounds Anchor/Snapping Points (for both layer(s) & document):
| ● Top Left | ● Top | Top Right ● |
| ● Left | ● Center | Right ● |
| ● Bottom Left | ● Bottom | Bottom Right ● |
In the options tab.
- Grid Snapping (Intersections of grid lines make snapping points)
- Layer Snapping (other layers bounds' snapping points)
- Tip: I find it easier/more natural to just toggle the grid (keGrid) off, or hide obstructing layers (to avoid snapping them) instead.
Centers the selected/active paint layer
Note: These can mostly be replaced with BSnap. But not exactly, so they're still available as options, should you prefer.
Variants:
- H : Centers paint layer to Horizontal center (only)
- V : Centers paint layer to Vertical center (only)
Scale selected paint/vector layer (or group) 50% or 200%
Stretches selected paint/vector layer (or group) to fit the document bounds
Option:
- Aspect: Fit Bounds maintains aspect ratio of the layer
Arrange layer(s) (paint, vector etc.) in a grid layout defined by columns & rows dividing the document's size
- If ONE layer is selected, the cells will be filled up with automatically duplicated layers

- If MORE than one layer is selected, they will fill up as many cells as are selected (row by row, in selection order)


- Columns & Rows (divide the document in grid cells, i.e: "4x4" etc.)
- Scale will resize the layer to fit the cell
- Aspect maintains layers aspect ration when Scale is used. Or not.
- Cell Alignment sets the "anchor" point inside the cell, in a pull-down menu (same 9 placement options as BSnap table above)
- Padding & Margin - Padding adds pixels inside the cells, and margin outside the cells (border). Separated for flexibility.
- Crop If you know how much of the (paint only) layer goes outside the cell, use for auto-cropping. (Scale off)
- Fill use with Scale to fit by the shortest axis, allowing for overlap in the other - for overlapping patterns (scales and such).
Example Fill Pattern:

Workflow Suggestions:
- Use the Grid (keGrid) for cell size "preview" (as pictured above) (Note: Arrange itself does not use the grid)
- When making/designing repeating patterns:
- Make a clone layer of the source layer,
- 'Arrange' the clone into an array of clones. Non-destructive and flexible.
- Tip: The clone source layer can be a group!
- Tip: To move the source layer afterwards:
Use the "Move layer with content" Move Tool option - unless you also want to move all the clones
Duplicates selection, or the entire layer if there's no selection, directly into a new layer
Also creates a flattened group copy when used on group(s)
1-click Desaturate.
Also, undo to reveal the temporary desaturated duplicate (that's merged down),
resulting in a desaturated duplicate layer.
Inverts the green color channel. Common texturing operation.

Set selection. Also; No Selection == Full selection (MODO style convienience!)
Applies the average color of the pixels to the selection.
Ignores color from transparent pixels - for a better/expected average
- (F) Option:
- FAST: (On) Limited pixel sample size for substantial speed increase (any image size) but with less color accuracy.
- ACCURATE: (Off) Process every single pixel for more accurate result (Very slow on large selections/images)

- Batch-exports visible root paint, clone & vector layers & groups from the current active document.
- Automatically creates a sub directory for the exports based on the document name & location
- The document needs to be saved before the batch operation
- Excluded (visible, root) Layers/Groups: 'Fx', 'Foreground', 'Background', "fg" or "bg"**.
These will not be exported - but kept visible during export to still affect output:- Useful for processing different groups with the same filters/fx and/or backdrop
Image example: Three layers with transparency (1) all use the same background (solid black)
and a "fx" hue filter (2) affects all the layers then batch-exported (3) - Excluded nodes are capitalization indifferent - any style will work: fx, FX, Fx etc.
- Useful for processing different groups with the same filters/fx and/or backdrop
Options:
- JPG: Export in JPG format instead of PNG.
- Format Defaults: (override in ke_batch.py if needed)
Batch-variant for a PBR game/vfx-ish texture export workflow, exporting visible layers and groups.
Works by strict naming convention:
-
Auto-naming: The layers/groups will use the document name as the basename and add the the the layer/group names as suffixes.
E.g: "concrete01.kra" exports become "concrete01_c", "concrete01_r" etc.
(if the layers/groups are named "c" and "r" - don't add any underscores manually!) -
Grayscale Layers/Groups:
- Named "b","d","r","m","ao","e","bump", "disp", "displacement", "roughness", "rough", "metal", "metallic", "emissive", or "mask",
will be exported as 8-bit grayscale
- Named "b","d","r","m","ao","e","bump", "disp", "displacement", "roughness", "rough", "metal", "metallic", "emissive", or "mask",
-
Color Layers/Groups:
- All other names, such as "diffuse", "c" or "n" or whatever that's not in the grayscale list,
will be exported as 8-bit RGB.
- All other names, such as "diffuse", "c" or "n" or whatever that's not in the grayscale list,
-
Note:
- Exports will be placed in the same dir as the doc (not in a generated sub-dir as Batch).
- BET follows the same exclusion rules for fx, fg & bg layers/groups as standard Batch.
- The export will autosave (saved doc must be latest + far less annoying than to forget...).
- PNG-only. Level 0/Uncompressed. For maximum speed now - oxipng (or pngcrush) later.
- Slow - it can take some time in big documents with a lot groups

Automates Channel-packing 3-4 layers into a single image using the RGBA channels.
Often used in real-time 3D. 'Splat-maps' or 'ORM Textures' for example.
- The "New" option toggled will create a new document for the setup
- Auto-merges groups when making a new doc, for convenience
- Uses clone layers (when not making new doc) to enable (non-destructive) “orm” export (for BET)
To Export RGB (No Alpha Channel):
Select 3 layers
- Select one by one in intended RGB order
- Run chPack & the selected layers will be arranged in a group, prepared for export
- Export/save as usual
- chPack detects “ao”/“o”,“r” & “m” naming in selected nodes and names chPack group “orm”
- Re-running chPack will replace an already existing “orm” group if found (iterative non-destructive workflow)
To Export RGBA:
The standard Krita PNG Export will erase data in the RGB channels when using Alpha.
Instead, Kritas "Split-Alpha" feature is used for full RGBA channel export:
- Select 4 Layers - in RGBA selection order
- Note that the Alpha layer cannot be a clone: Manually update Alpha.
- Run chPack & the selected layers will be arranged in a group, prepared for export
- Use RMB on the created Group Transparency Mask (as the "Alpha Channel") and use Split-Alpha / Save as Merged to export.
Creates separated Red, Green and Blue color channel clone layers, in groups, of the selected paint layer.
Note that alpha is not "unpacked" and will need to be handled separately.
Made for 'ORM Texture' unpacking. Non-destructive.
Scales, duplicates and places 4 tiles (copies) of the selected paint layer to fit the image bounds.
Note: Not listed in the keKit docker, as it is mostly replaced by Arrange. Still available for legacy support.
- Make sure the layer is trimmed to image size!
Simple 'cross-offset' seamless tiling - creates a group of masked layers.
Short YouTube Video demo:
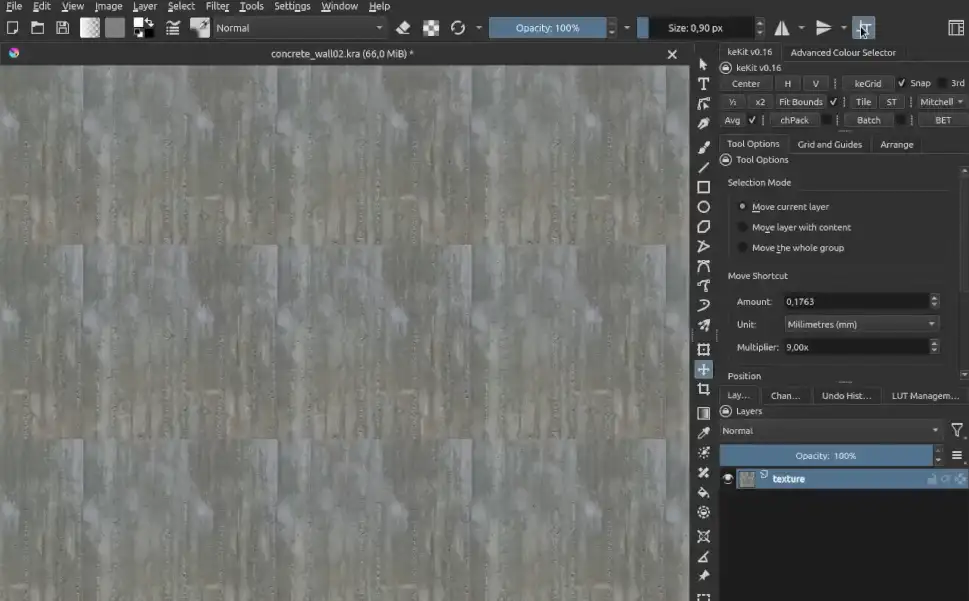
- This is a very simple method, do not expect every case to work well
- The mask is a regular PNG included in keKit, adjust to your liking if needed
- Tip: Tweak with Kritas Wrap-around mode.
Calculates a relative rectangular grid (with user-defined divisions) based on the document size.

- Will automatically clear "grid offset" values.
- Not "dynamic": Requires updating (toggle on/off) if your document size changes.
- Some line-offset glitches may occur, especially when using thirds/uneven pixel sizes
(it is just auto-calculating the Krita's fixed grid, thus the same limitations)
Options:
- Divisions: Set the grid division (with automatic subdivisions). "4" = 4x4 (16 cell) grid, etc. (as image above)
Note: I'm using the subdivisions for esthetic reasons, and usability (keeping center lines distinct). - Thirds: Uses Rule of Thirds instead of quad grid layout.
Note: Thirds divs are pow3, i'm just re-using the pow2 list, so then 2=3, 4=9 and so on.
Also, to re-iterate, line-glitches are bound (sic) to happen (see above)
Note:
- Intended for shortcut use (E.g: replacing "Show Grid" toggle-shortcut)
- To snap the layer (bounds) to the grid (intersections) you can use BSnap (see above)
Choose preferred pixel transform processing method for Half, Double & Fit Bounds etc.
- Mitchell, Lanczos3 etc.
- Default is a keKit scripts special: Uses Lanczos3 scaling down & Mitchell scaling up.
Right here. Leave messages (with appropriate tags & description) in Issues tab at the top!
Alternatively, check the keKit thread on the krita-artists.org forum.