Before executing Terraform code please make sure following things.
- To run this code you must have AWS CLI installed and configured along with terraform on environment from where you will be executing this code. (If executing Terraform code from Laptop or any VM)
- Craete an S3 bucket to serve as a backend for storing terraform state file.
Terraform code for provisioning infrastructure on AWS is on root of this repo.
Default values for all variables are already set in variables.tf file. If you want to override any default value, so feel free to pass it through terraform apply command or create terraform.tfvars file with specific variables.
If you want to run this Terraform code from your Laptop or any VM so first you will need to initiate terraform by providing details of your S3 bucket.
terraform init -backend-config="bucket=<S3 bucket name>" -backend-config="key=<S3 bucket key name>" -backend-config="region=< AWS Region>"Then you can run following commands to plan and execute terraform code.
terraform plan
terraform apply
This code will provision following resources in your AWS account.
- VPC
- Four Subnets (two public and two private).
- A Nat Gateway (this will be attached in one of the public subnets to provide secure internet conectivity to pods deployed in private subnets).
- A Internet Gateway.
- Two Route Tables (one with rule to route traffic from private subnets to nat gateway and other with rule to route traffic between public subnets and internet gateway).
- EKS Cluster using Fargate (all required IAM policies and roles also will be created).
- A OIDC Provider for EKS cluster conectivity with other AWS resources.
- Two Fargate Profiles (one for kube-system namespace and other for custom namespace in which you can deploy application using helm code available in this repo. To improve security both profiles will be attached with private subnets so that pods can be deployed only in private subnets.).
- Install Metrics Server so that HPA can be implemented on cluster.
- Install AWS LoadBalancer Controller for handling ingress resources (all required IAM policies, roles and service account also will be created).
This folder contains GitHub Actions to automate EKS Cluster deployment using Terraform code.
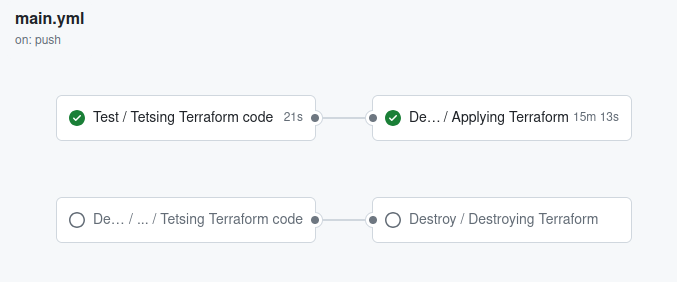
There are two workflows, First one is for provisioning infrastructure. Which will be triggered automatically on push event to main branch. In which it will,
- Test and plan Terraform code
- Apply Terraform code
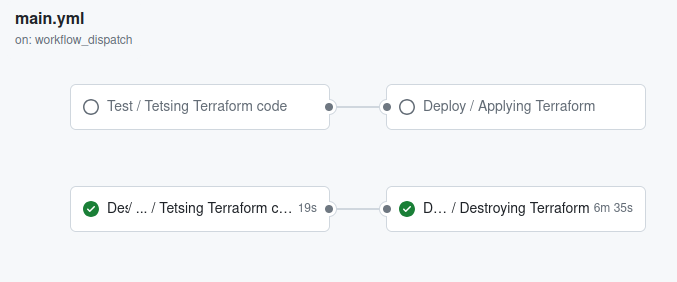
Second workflow is for destroying whole provisioned infrastructure. It can be triggered manually. In which it will,
- Test and plan Terraform code
- Perform Terraform destroy
You will have to setup follwoing things to run this workflows.
- Setup S3 bucket which will be used by Terraform backend to store state file. You will need S3 bucket's name, key name and region, later to configure GitHub action's variables.
- Create OIDC to connect AWS with GitHub. Do following steps to create OIDC provider in your AWS account.
- Go to IAM dashboard and from left pane select Identity Providers.
- On top right corner of page click on Add Provider.
- Now select OpenID Connect.
- In Provider URL add this
https://token.actions.githubusercontent.com. - In Audience add this
sts.amazonaws.comand click on Add Provider.
- Create IAM Role and assign necessary permissions to it. This will be used by GitHub Actions to perform deployments on your AWS account. Use following steps to create IAM Role.
- Go to IAM dashboard and form left pane select Roles.
- On top right corner of page click on Create Role.
- Then select Custom trust policy and add follwoing policy. Replace place holders with your own accounts information.
-
{ "Version": "2008-10-17", "Statement": [ { "Effect": "Allow", "Principal": { "Federated": "arn:aws:iam::<aws account id>:oidc-provider/token.actions.githubusercontent.com" }, "Action": "sts:AssumeRoleWithWebIdentity", "Condition": { "StringLike": { "token.actions.githubusercontent.com:sub": "repo:<github username>/<repo name>:ref:refs/heads/<branch>" } } }, { "Effect": "Allow", "Principal": { "AWS": "arn:aws:iam::<aws account id>:user/<aws account username>" }, "Action": "sts:AssumeRole" } ] } - Click Next and on next window select all policies which are needed by your GitHub action workflow to perform operations on your AWS account. (For demo purpose you can select AdministratorAccess but in production this is not recommended)
- Then click next and give name to your role and create role. After creating role navigate to it and save it's ARN because it will be needed in GitHub Action's secrets.
- Now Configure following secrets in your GitHub account. To see how to configure secrets, you can have a look on this link.
- AWS_ROLE (add the arn of your AWS Role in secret which you have created above).
- TF_VARS (add variables in secret like following which you want to override for default values. If you don't want to override any value so skip this.)
var1=xyz
var2=abc
var3=123
- Now configure following Variables in your GitHub account. To see how to configure secrets, you can have a look on this link.
- AWS_BUCKET_NAME (add your S3 bucket name in value which you have created to store Terraform state file).
- AWS_BUCKET_KEY_NAME (add key name in value which you have created in your S3 bucket to store Terraform state file).
- AWS_REGION (add AWS account region in value on which operations will be perform e.g "us-east-1").
- CLUSTER_NAME (add any name in value which you want to assign to your EKS cluster e.g "demo-cluster")
Once all above Pre-Requisite steps are done you will be ready to give it a run.
For that, push any small change in to main branch and deployment workflow will be triggered. Once that will complete successfully infrastructure will be provisioned on your AWS account.
To destroy whole infrastructure trigger workflow manually with value "destroy" and a second workflow to destroy infrastructure will be triggered. After it will be completed successfully your AWS account will be cleaned.